-
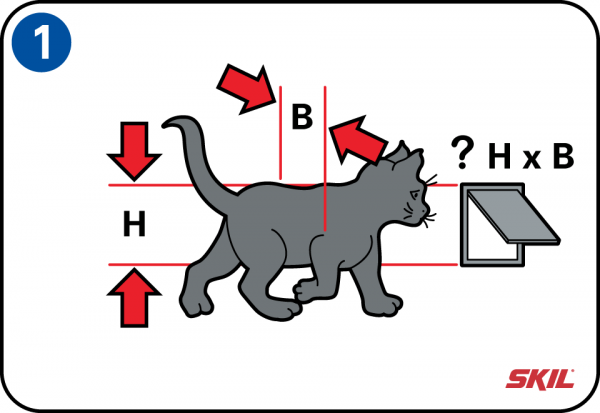
Measure your cat
Cats aren’t all the same size. To be able to go in and out, the cat flap needs to be the right height above the floor. The average height of a cat flap is 15 cm above the floor. This is also the average height of a cat’s stomach. Mark out the right height at two points to ensure a straight line.
-
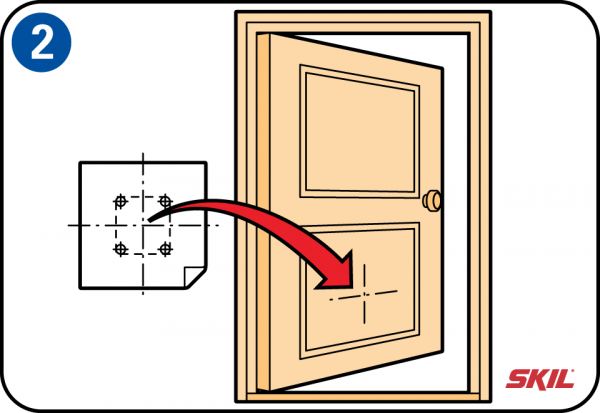
Choosing the right place
Most cat owners fit a car flap in the center of the door. To do that, first mark out the center point of the door.
-
Marking out the position
Most cat flaps are supplied with a paper template, so you can see where you need to drill the holes marking the area to saw out of the door. Make sure that the middle of the template is at the center point of the door. Use tape to hold the template in place.
-
Choose the right drill
The drill diameter needs to be a bit bigger than the width of the blade in your jigsaw, so you can rotate it in the hole you’ve drilled. Wear your safety glasses and make sure no loose clothes or hair are in the way while you’re sawing.
Drill the holes
Drill a hole at each corner of the template. The positions of these holes mark the square contour of the cat flap. Mark the horizontal and vertical lines directly on the door. -
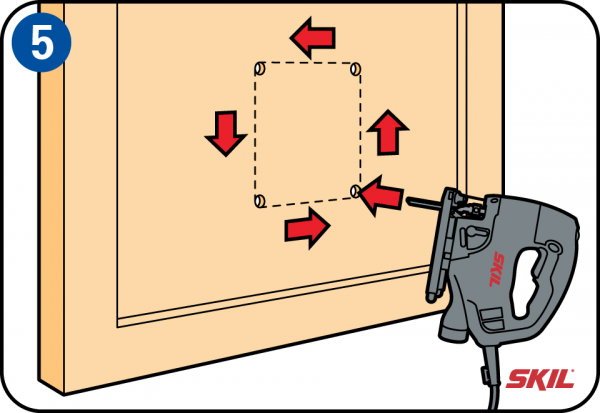
Saw out the opening
Before you start sawing, first make sure the door is closed. Take a stable working position and insert the jigsaw blade in one of the holes. Keep the saw flat against the door and make sure it doesn’t move up and down while you’re sawing. Take your time when you’re sawing. Follow the lines carefully and saw in as straight a line as possible between the drilled holes.
-
Re-using the removed piece of wood
After you’ve sawed all round the line, remove the inner square of wood from the hole. If you haven’t bought a ready-to-use cat flap then you can use that piece to make your own cat flap.
Finishing
Finish the inside edges of the hole with sandpaper and remove the dust with a vacuum cleaner.
Place the front part of the cat flap over the hole and check that the flap can move freely. -
Mark out the fixing holes
When you’ve placed the front of the car flap straight in the door, you can mark out the positions of the fixing holes in the four corners.
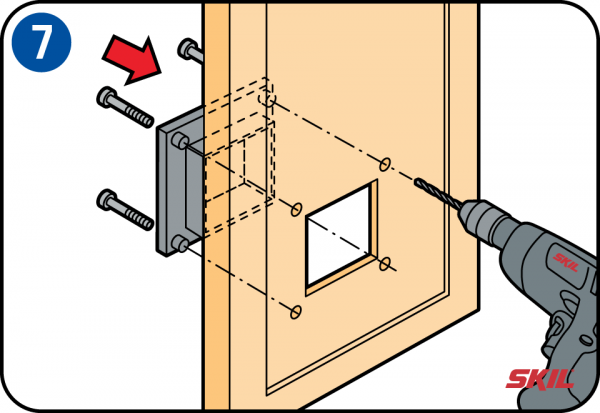
Drill the fixing holes
Drill the fixing holes at each of the four places you’ve marked right through to the other side of the door. Make sure you hold the drill perfectly horizontally.
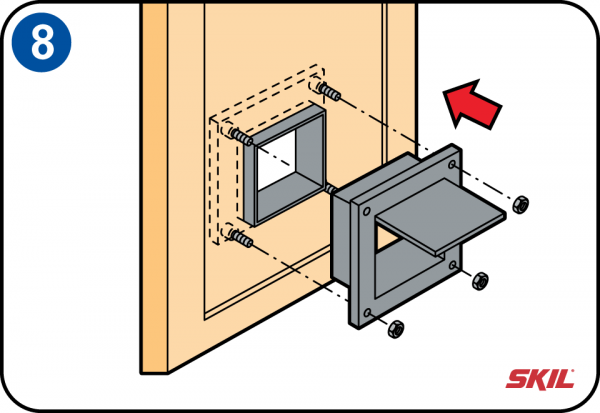
Fit the outside part of the cat flap
Hold the inside part of the car flap in position over the four holes and insert the long bolts through the holes. Then open the door and place the outside part of the cat flap over the protruding bolts. Different types of cat flaps are available, and the fixing methods may differ. -
Fix the cat flap in place
With the fixing nut in one hand and the screwdriver in the other, fit the nut so it is finger tight. Repeat with the other three nuts. When you’ve fitted all four nuts, check that the bottom edge of the cat flap is perfectly horizontal. Then tighten all the nuts securely.
-
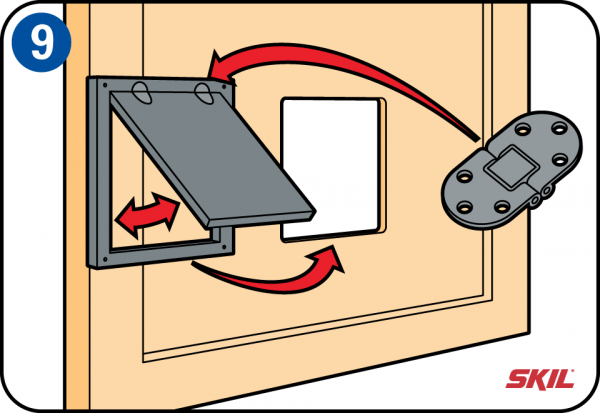
Making your own cat flap
You can also finish the inner square of wood that you’ve removed neatly and use it as a cat flap. Fit a wooden frame with two-way hinges at the top so the cat flap can open in both directions. You can fit a strip of wood at the bottom of the flap for extra weight.