-
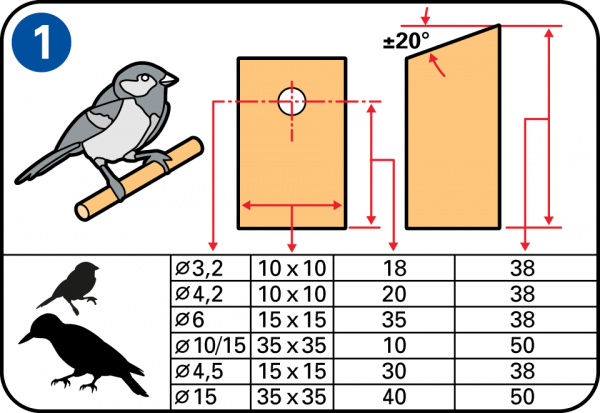
Decide on the right opening size
The size of the birdhouse and of the entry hole will determine the kind of birds that will visit it. The right opening size for birds like finches and great tits is 3.2 cm, while for a crow or jackdaw it should be 15 cm.
-
Saw the wood to size
Draw out the sizes on the plank and saw the parts to the right sizes.
-
Finish the pieces of plank
Sand the sawn edges smooth with sandpaper.
-
Drill out the entry opening
Drill out the entry opening at 18 cm from the bottom of the front plank with a 32 mm hole saw. To prevent the wood from splintering, place the plank on a piece of waste wood while you are working. Drill through the plank and at the same time drill a small distance into the piece of waste wood. This will give you a nice smooth result.
-
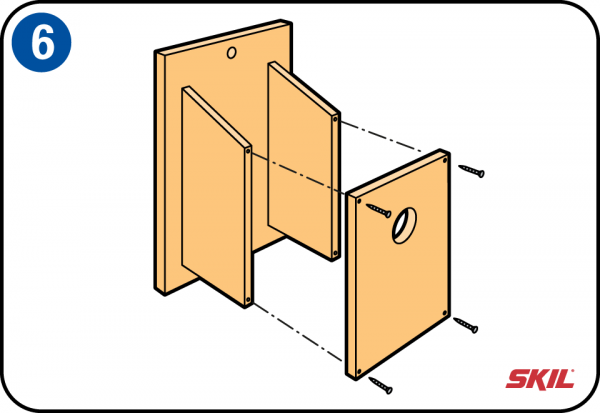
Mount the side panels of the birdhouse
Mount the side panels against the rear wall using water-resistant wood glue and nails or screws. Pre-drill the holes first to prevent the wood from splitting. Then pre-drill the mounting holes for the birdhouse.
-
Assemble the front panel
Fit the front panel of the birdhouse to the side panels using water-resistant wood glue and nails or screws.
-
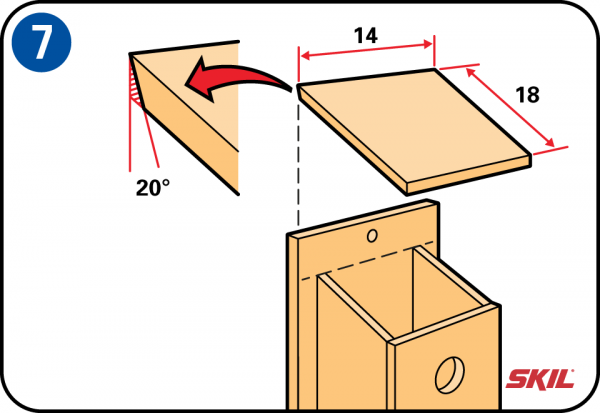
Fit the roof
Saw, shave or file the rear panel of the roof at a slope of 20. This will ensure that the roof fits better onto the rear wall.
-
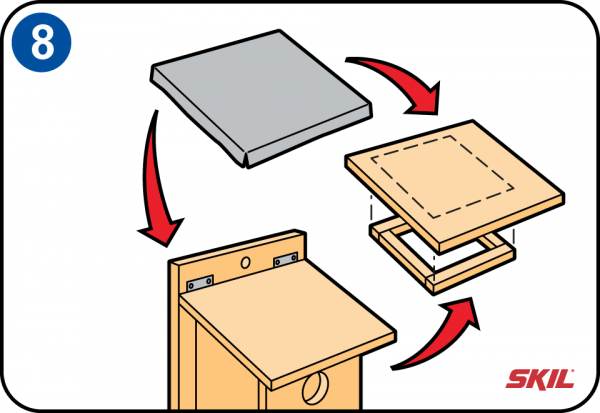
Finishing the roof of the nesting box
If you want, you can fit hinges to the rear side of the roof. You can also fit extra planks under the roof. These should be 5 mm less than the internal sizes of the walls and front, so the roof is more or less fixed. Then cover the roof of the birdhouse with a piece of roofing felt or lead sheet.
-
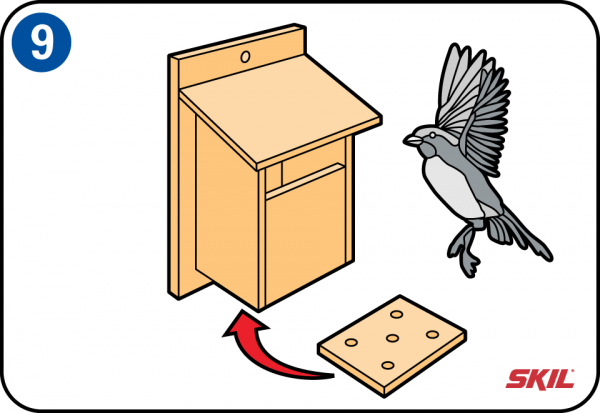
Base
To allow drainage, drill a number of 10 mm holes underneath the birdhouse. As an alternative for a round entry hole, you can also make the front side lower. The advantage of this is that it allows the birdhouse to be used by different kinds of birds.